This will be the first in a series of blog posts describing how I use PVE as a base for my NAS, and to host other services. In this installment, I’ll discuss the the hardware required, the installation of PVE, and the initial post-install configuration.
Why use Proxmox?
There are plenty of choices for an OS to build on. Picking one is going to depend on what you want it to do. If all you want is something to host media files on, OpenMediaVault is an excellent choice, as is LibreELEC. I want to goa little further, with a single server to act not just as a NAS, but to run Home Assistant, and several other services. This means I want a hypervisor, where I can virtualise each of these services. While the above choices can all be made to act as a hypervisor, they lack the ease of use of systems designed specifically around it.
With that decided, there are really only a few good choices. Proxmox Virtual Environment, TrueNAS (Core or Scale) and Unraid are all old hats, and perfectly valid choices. HexOS is the new player on the scene, and has gained a significant userbase including Linus Sebastian. Of these, I have experience of both TrueNAS versions, having used it extensively in the past, as well as PVE which remains my current favorite. I find managing containers and VMs easier with PVE than TrueNAS, and overall find it more stable and nicer to use. The documentation is generally very good, and its development pace keeps a good balance between stability and the addition of new features.
Hardware
My NAS is built around what I could get cheap/free from group swaps, second hand marketplaces, and friends. As a result, its a little older, but for my needs its perfectly fine. The CPU and motherboard came together from eBay for £25, with 2 8GB RAM modules. I added another 2 from another eBay seller for a total of 32GB of ram. The boot drive is actually a zfs Mirror consisting of 2 old Sata SSDs I had from a previous desktop build which provides a nice level of redundancy for the boot drive, but it by no means necessary. The NAS drives are 3 16TB Dell branded Seagate Exos x16s which hang of an LSI HBA (more on that later), which had about 1000 hours of use on them when I picked them up. Not including the NAS drives the system cost me under £75. With them included, it was still comfortably under £500, which for 32TB of redundant NAS storage, and all the VMs I can run, is a bargain. By looking for deals, and adding less storage (32TB is glorious overkill for most uses, I have a lot of photos and videos, and a large music library, and I’m still only using around a quarter of the available space) you can easily get it done for less than £250 if you don’t plan on doing anything to mad with it. Just be aware when buying storage media to avoid SMR drives (the WD Red range is particularly bad for them) and to be mindful of where the server will be located (these Exos drives are crunchy, not sure I’d want to sleep in the same room as them).
The rack-mount case I swapped a desktop case for came with insufficient 3.5" drive bays, so I ended up modifying some removable bays from another system. In future I will 3d print some better mounts with proper vibration dampening, but for now these will do. As you can see, the sata cables are too tall to fit, so replacing them with right angle adapters was a necessity.
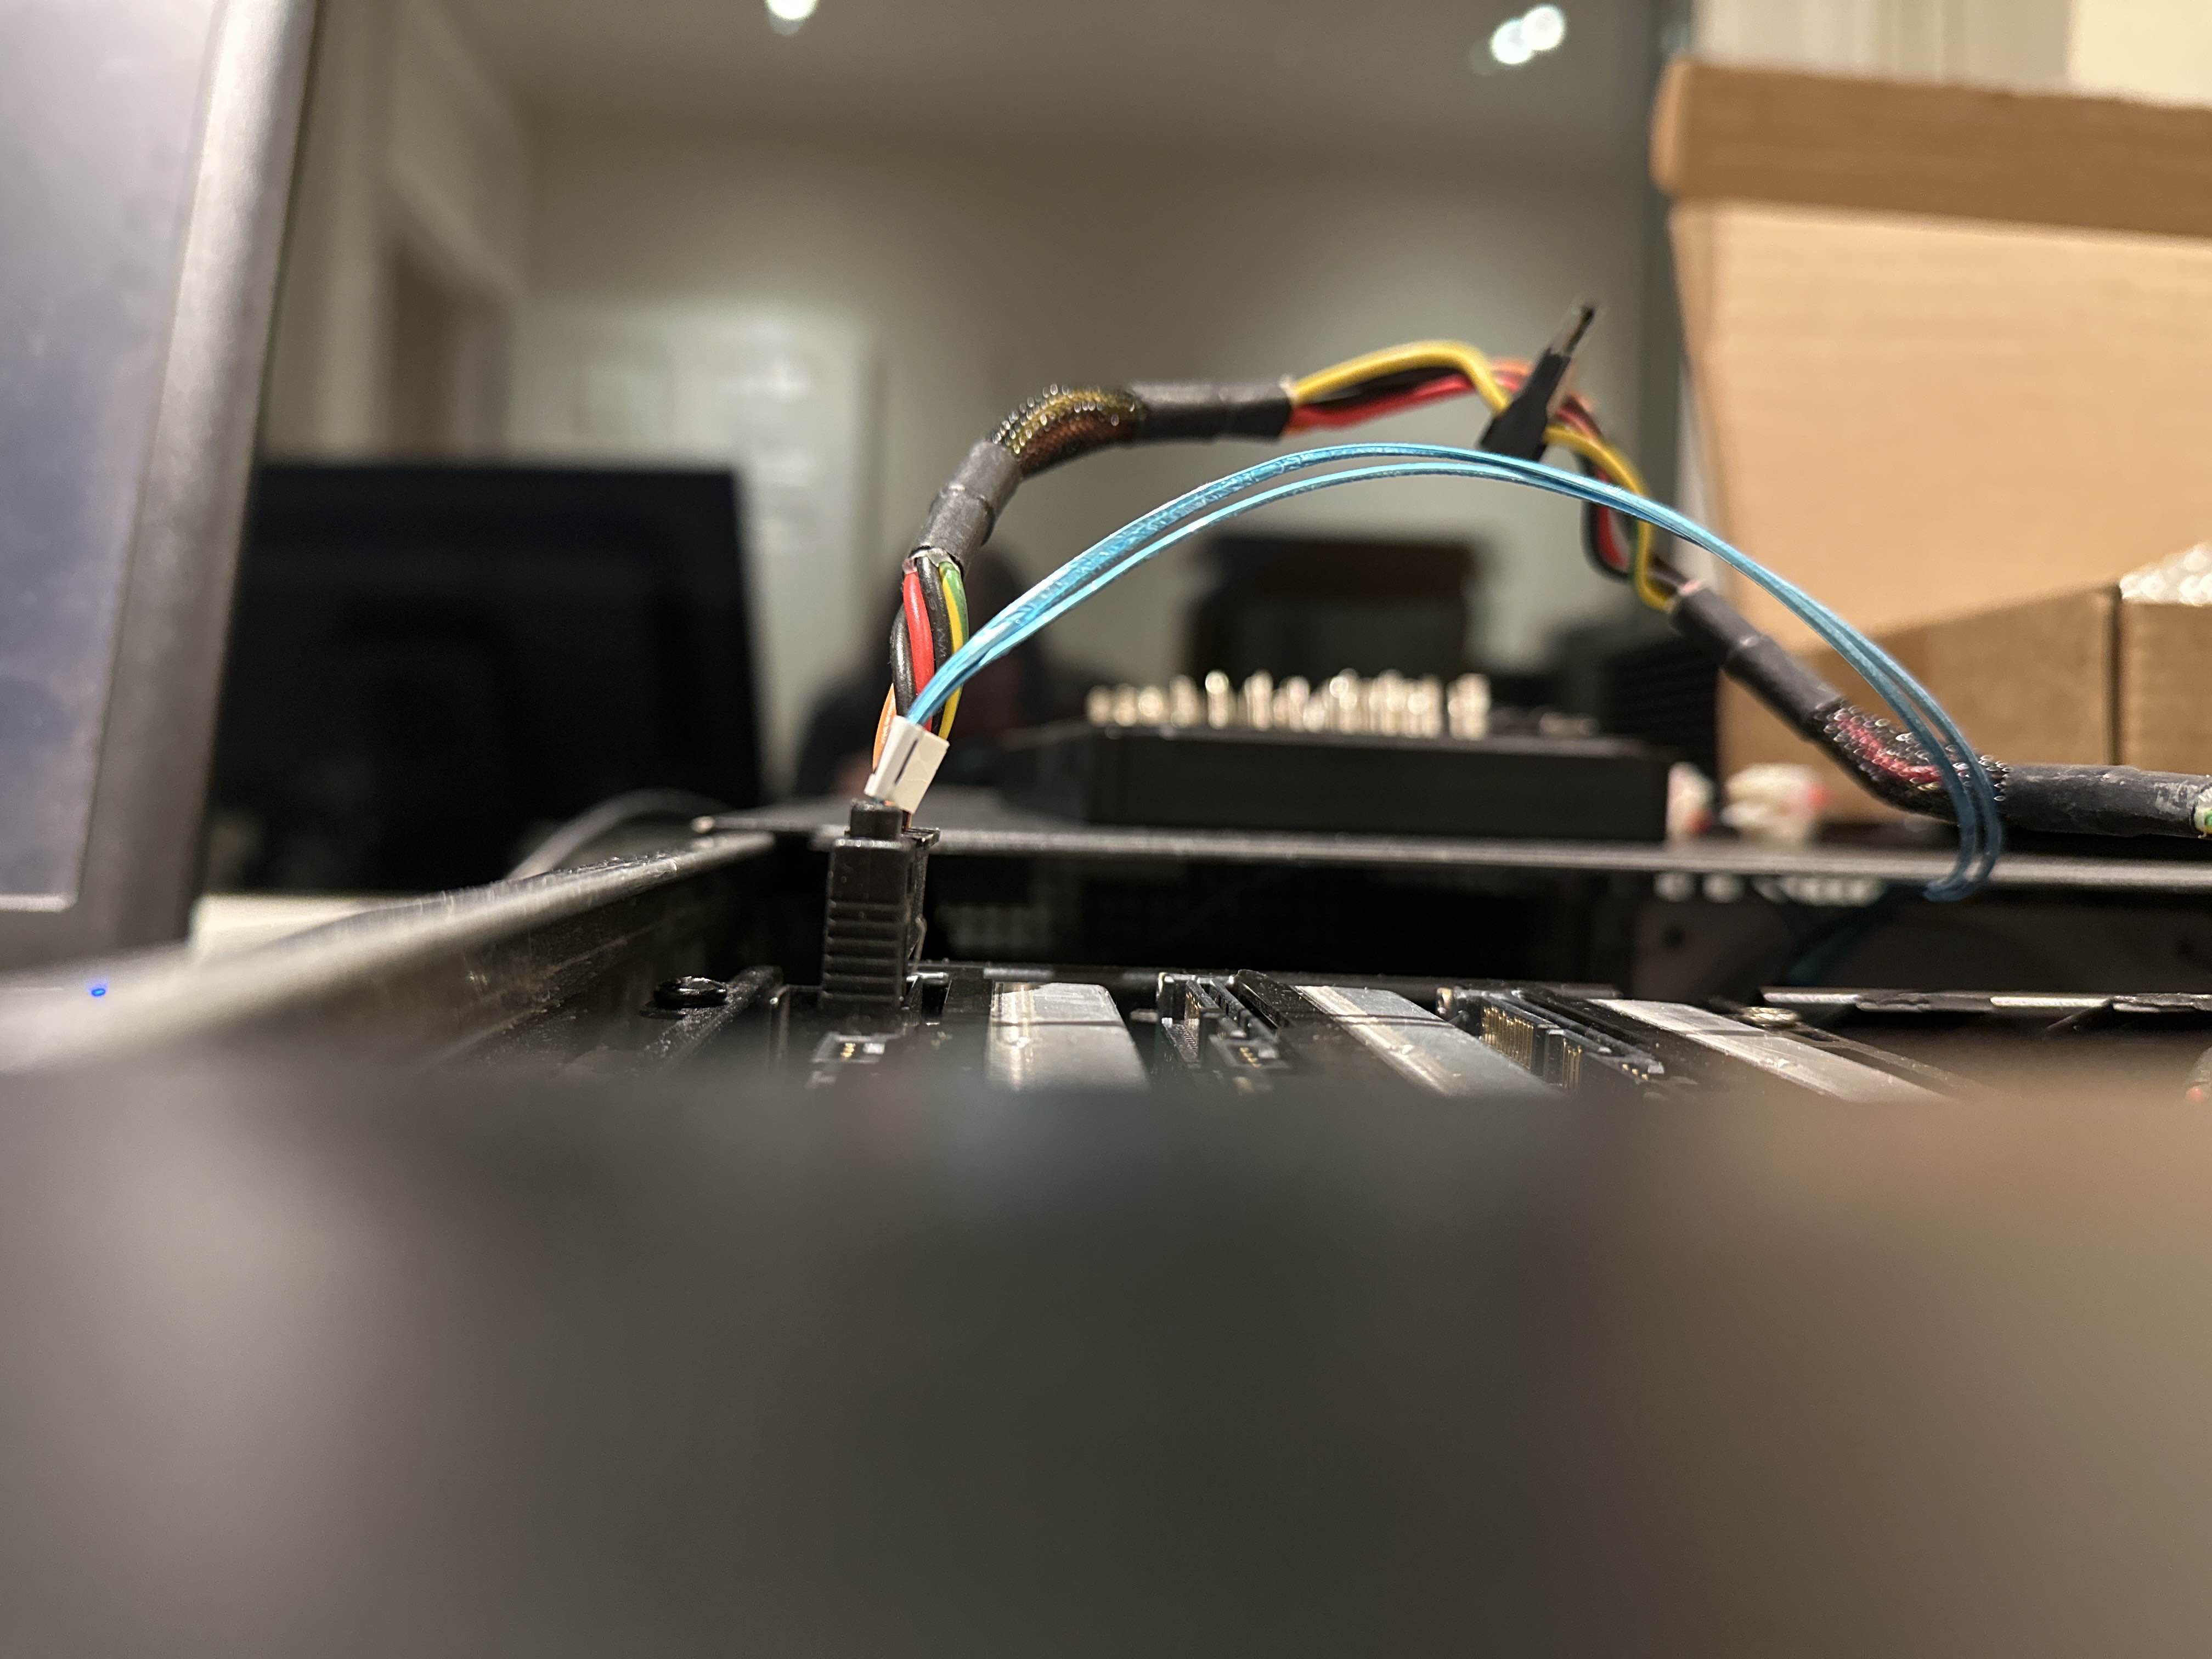
A tight fit!
Installing Proxmox
Before we can configure anything, we need to install and configure PVE. Grab the image from the official site and write it to a USB drive (I find the built in Fedora Media Writer the easiest way to do it, since its already installed on Fedora Workstation, but there are more than enough guides on how to do this in just about any OS on the net) and boot it up. Run through the setup process which is fairly self explanatory I recommend using a ZFS boot disk, but its by no means mandatory. Make sure you configure the network setting correctly, and assign it an IP address that is both within the address range of your LAN, and not in use by another device. Its best practice to set a static IP for your server in your DHCP server. If you don’t know the MAC address at this stage, don’t worry about it for now. As long as the IP address you specify in the installer is within range and not reserved PVE will request it, you can add the reservation later. Once the install is complete, restart and boot into PVE. From this point, you can connect to it using the IP address and credentials you set during install. Don’t forget to append the port number to the IP address in your browser, if you haven’t changed it, it will typically be 8006 (i.e. https://192.168.0.10:8006).
Configuring PVE
When you first login to PVE in your web browser you will see a notification telling you that you don’t have a subscription. This is perfectly fine, and can simply be closed. If it irritates you, you can disable it using one of the many guides available online, or better yet buy a license and support the project.
It appears at the moment there is an annoying quirk when using Firefox to access the web GUI. This dialogue box, as well as others, cannot be closed. The fix is simple, refresh the page and it will vanish. I haven’t looked into whats causing this yet, as its almost a non-issue for me at the moment, but if I do I will update this article.
Updates
Unless you have a subscription, which as a home user you probably dont, you will need to change the repos PVE uses to update, as you won’t have access to the paid ones.
In PVE 9.0 and later (Current version at time of writing is PVE 9.0.10) this is easily done from the command line, easily accessible from the Shell page for the server you are administering, found by selecting the server under datacenter list, and selecting “Shell” from the list of options that appears. In future this will be referred to as the host shell. It can also be done by accessing the PVE host over SSH, whichever you prefer.
Once in the shell, we need to edit a few files. Handily, PVE comes with Nano to edit files in the shell, and you are probably signed in as root so there is no need to do any sort of command elevation.
First, we edit the proxmox.sources file using:
nano /etc/apt/sources.list.d/proxmox.sources
We need to modify this file so it looks like the one below:
Types: deb
URIs: http://download.proxmox.com/debian/pve
Suites: trixie
Components: pve-no-subscription
Signed-By: /usr/share/keyrings/proxmox-archive-keyring.gpg
We then repeat this for pve-enterprise.sources and ceph.sources in the same directory with the following contents:
pve-enterprise.sources:
Types: deb
URIs: https://enterprise.proxmox.com/debian/pve
Suites: trixie
Components: pve-enterprise
Signed-By: /usr/share/keyrings/proxmox-archive-keyring.gpg
Enabled: false
ceph.sources:
Types: deb
URIs: https://enterprise.proxmox.com/debian/ceph-squid
Suites: trixie
Components: enterprise
Signed-By: /usr/share/keyrings/proxmox-archive-keyring.gpg
Enabled: false
We then refresh the list of updates, and install any that are available.
apt update && apt upgrade -y
If you want, you can install and use the unattended-upgrade package to automatically check for an apply updates from now on.
Create Swapfile
When installed on a ZFS filesystem, PVE doesnt create a swapfile. This is easy to rectify. First, we create the zpool:
zfs create -V 8G -b $(getconf PAGESIZE) -o logbias=throughput -o sync=always -o primarycache=metadata rpool/swap
Then we prepare to use it as swap:
mkswap -f /dev/zvol/rpool/swap # Prepares the partition to be used as swap
swapon /dev/zvol/rpool/swap # Specifies the zvol to use as swapfile
We can check it worked using:
swapon -s
and checking the swap file is listed. Finally we add it to /etc/fstab so that the system will enable it at boot:
echo "/dev/zvol/rpool/swap none swap discard 0 0" >> /etc/fstab
What’s Next?
In the next installment, we will discuss adding our NAS drives, and creating the container(s) we will use to make them available on our network.